Introduction
This module will help you make a diagram to explain your wireless project to people in the community. Especially when you conduct surveys or bring people together for a meeting, it is a good idea to have a diagram on hand as an example or illustration of what you are proposing. This module contains samples and step-by-step guidelines for making a flyer.
Time required: 1-2 hours.
MATERIALS + SUPPLIES NEEDED
8.5"x11" pieces of paper to draw on and glue onto.
A surface to work on (preferably a table so people with mobility challenges can participate comfortably).
Scissors
Glue sticks
Pen
Access to a copier (optional)
A printed copy of the "Design your Network: Construction Elements" module (optional)
Creating a Diagram
ARRANGE ELEMENTS TO MAKE A DIAGRAM

- Decide whether you want to sketch your neighborhood or use pieces from the "Design your Network: Construction Elements" module. If you're using the Construction Elements, cut out the ones you recognize from your neighborhood and any other pieces you want to use.
- Sketch or arrange the elements on the page to look like your neighborhood. Focus on the features that will be part of your network and use only what you need so the page is clean and simple.
- Remember to include images of people, the most important part of any network!
- Once you have the basic neighborhood depiction, glue the elements in place.
- Add wireless signal images or dotted lines to show the buildings you would like to connect, or draw the connections with a marker.
- Test! Show your diagram to someone and ask them to tell you what they think it says. Keep revising until your message is clear.
- Optional: For a more professional look, ask an experienced artist or graphic designer to make a new image based on your diagram. Or use graphic design software like Inkscape or Illustrator to redraw and polish your diagram.
- Once you have your diagram, make copies to share your vision with your neighbors.
If you are working with partners, let them make their own diagrams, then compare and discuss. Or collaborate on a shared document before gluing down the pieces. The graphic elements are scaled for letter-sized paper. If you want to collaborate on a bigger piece of paper, use a copier to enlarge and duplicate the elements.
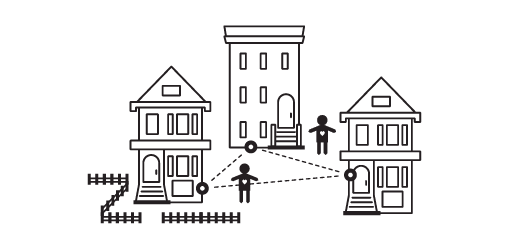
Sample Outreach Diagrams
You can show the potential connections among a few buildings. The arrow notes a connection to the Internet.
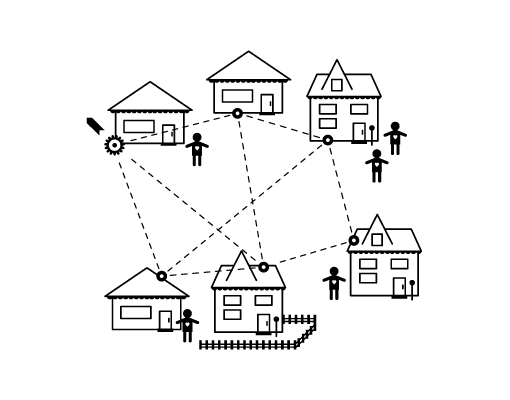
You can depict an entire neighborhood network.
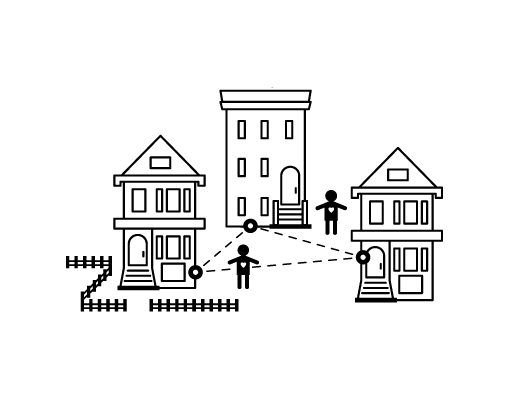
You can show just one section of the neighborhood network.
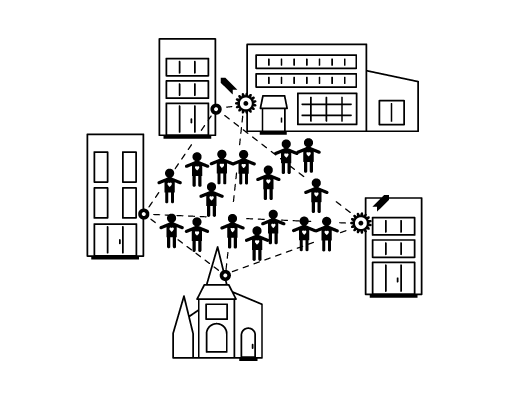
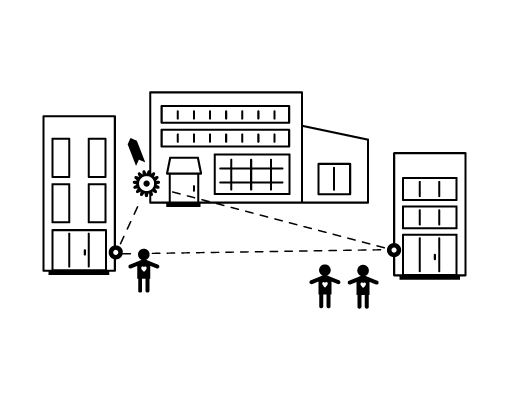
You can show how nearby buildings can share Internet access with an occupation of the town square.
Use the Diagrams in an Outreach Flyer
You can add text to your diagram to create a flyer to distribute in your neighborhood.
OUTREACH FLYER DESIGN ESSENTIALS
1. Headline
What is the main idea you are presenting? 8 words or fewer, big across the top.
2. Sub-headline (optional)
Expand on the headline, but keep it simple and do not repeat words from the headline.
3. Diagram
Your beautiful diagram of your proposed network should be the centerpiece of your flyer.
4. Explanation of what you are doing
Answer the question you are most likely to be asked, which may be "How does this work?" or "What are you trying to accomplish?" This can be up to 100 words, but should still be in text that is big enough to be read quickly and easily.
5. Potential benefits
List the reasons why someone would put effort into the project. Do not over-promise; make it clear that any of this is only possible if enough people participate.
6. We provide
It is helpful to present the project as an exchange. This means including a clear list of what you are offering, as well as what you are asking others to contribute. Distinguish between what you are giving conditionally and what you are selling. If you are asking for money, be as specific as possible about the amount. "What will this cost me?" is likely to be a person's first question about your proposal.
7. You provide
Are you asking your neighbor to install a wireless node or permit you to do so? Are you asking them to share an Internet connection, come to a community meeting, or take a survey? Make a clear request with a single sentence or a list of what you are asking others to contribute.
8. Contact information
Identify who is sponsoring the project. If you want people to follow up with you, provide contact information. Remember that not everyone will have access to email or the Internet.
Test! As with the diagram, try the flyer out on a couple people from your intended audience to make sure it says what you want it to say. If people do not understand words you used, ask them to help you rephrase it to be more understandable. If these are irreplaceable technical terms, you may have to include a brief definition or you may decide technical explanations are not necessary at this stage. Because you have so little room on the flyer, you will usually find it easier to eliminate these terms altogether. Keep only the essential information.
Design note: All text on any outreach flyer should be big and easy to read. If you are using a computer, the text should be at least 13 point.
Example Flyer
![]()
These diagrams are not about technical details. For now, it does not matter about what equipment you are using — focus on getting the idea across so people who are new to the project can understand the basics of what you're proposing.
External Resources
Attribution: "Scissor" symbol from thenounproject.com collection.